在网页设计中,经常需要通过页面滚动实现楼层跳转。jQuery可以帮助我们方便地实现这样的效果,本文将介绍如何使用jQuery制作简单的页面滚动楼层监听,并支持自定义楼层数量。
前置知识
在开始之前,需要了解以下相关知识:
- jQuery库及其基本语法
- HTML5文档结构
实现过程
添加HTML结构
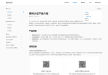
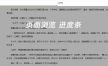
在HTML文件中添加需要实现楼层监听的结构。假设我们有3个楼层,分别为“首页”、“产品介绍”和“联系我们”,则HTML结构应该如下所示:
<body>
  <nav>
    <ul>
      <li><a href="#home">首页</a></li>
      <li><a href="#product">产品介绍</a></li>
      <li><a href="#contact">联系我们</a></li>
    </ul>
  </nav>

  <section id="home">
    <!-- 首页内容 -->
  </section>

  <section id="product">
    <!-- 产品介绍内容 -->
  </section>

  <section id="contact">
    <!-- 联系我们内容 -->
  </section>
</body>
添加CSS样式
为了让页面更加美观,我们需要为导航栏和楼层添加一些CSS样式。代码如下:
nav {
  position: fixed;
  top: 0;
  left: 0;
  background-color: white;
  width: 100%;
  z-index: 999;
}

nav ul {
  list-style: none;
  margin: 0;
  padding: 0;
  display: flex;
  justify-content: space-around;
}

nav li {
  margin: 0 10px;
}

section {
  height: 100vh;
  display: flex;
  justify-content: center;
  align-items: center;
  text-align: center;
  font-size: 4rem;
}
添加jQuery代码
我们需要添加jQuery代码来实现楼层监听效果。
需要定义楼层的数量变量。可以通过选择器获取页面的所有楼层元素,再使用length属性获取其长度即可。
var floorNum = $('section').length;
需要为每个导航栏链接绑定点击事件。当点击链接时,应该阻止默认事件,并使用animate()方法将页面滚动到对应楼层。还需要为当前链接添加一个active类,以标识当前所在楼层。
$('nav a').click(function(event) {
  event.preventDefault();
  var target = $(this).attr('href');
  $('html, body').animate({
    scrollTop: $(target).offset().top
  }, 1000);
  $(this).addClass('active').parent().siblings().find('a').removeClass('active');
});
还需要添加一个滚动事件,在用户滚动页面时更新导航栏的状态。代码如下:
$(window).scroll(function() {
  var scrollTop = $(this).scrollTop();
  var floorIndex = 0;

  $('section').each(function(index, element) {
    if (scrollTop >= $(this).offset().top - $(window).height() / 2) {
      floorIndex = index;
    }
  });

  $('nav li').eq(floorIndex).find('a').addClass('active').parent().siblings().find('a').removeClass('active');
});
完整代码
以下是完整的HTML和jQuery代码。请将其保存为一个HTML文件并在浏览器中打开,以查看效果。
<!DOCTYPE html>
<html lang="en">
<head>
  <meta charset="UTF-8">
  <title>jQuery实现页面滚动楼层监听</title>
  <style>
    nav {
      position: fixed;
      top: 0;
      left: 0;
      background-color: white;
      width: 100%;
	  z-index: 999;
	}

	nav ul {
	  list-style: none;
	  margin: 0;
	  padding: 0;
	  display: flex;
	  justify-content: space-around;
	}

	nav li {
	  margin: 0 10px;
	}

	section {
	  height: 100vh;
	  display: flex;
	  justify-content: center;
	  align-items: center;
	  text-align: center;
	  font-size: 4rem;
	}

	nav a.active {
	  color: red;
	  border-bottom: 2px solid red;
	}
	</style>
</head>
<body>
<nav>
<ul>
<li><a href="#home">首页</a></li>
<li><a href="#product">产品介绍</a></li>
<li><a href="#contact">联系我们</a></li>
</ul>
</nav>

<section id="home">
<h1>首页</h1>
</section>

<section id="product">
<h1>产品介绍</h1>
</section>

<section id="contact">
<h1>联系我们</h1>
</section>

<script src="https://cdn.bootcss.com/jquery/3.4.1/jquery.min.js"></script>
<script>
$(function() {
var floorNum = $('section').length;

  $('nav a').click(function(event) {
    event.preventDefault();
    var target = $(this).attr('href');
    $('html, body').animate({
      scrollTop: $(target).offset().top
    }, 1000);
    $(this).addClass('active').parent().siblings().find('a').removeClass('active');
  });

  $(window).scroll(function() {
    var scrollTop = $(this).scrollTop();
    var floorIndex = 0;

    $('section').each(function(index, element) {
      if (scrollTop >= $(this).offset().top - $(window).height() / 2) {
        floorIndex = index;
      }
    });

    $('nav li').eq(floorIndex).find('a').addClass('active').parent().siblings().find('a').removeClass('active');
  });
});
</script>
</body>
</html>
通过以上步骤,我们可以非常简单地实现页面滚动楼层监听功能。只需要添加HTML结构、CSS样式和jQuery代码即可。同时,我们还支持自定义楼层数量,只需要在HTML中添加对应的楼层元素即可。
希望本文能够帮助你理解jQuery实现页面滚动楼层监听的原理,并能够运用到自己的网页设计中。